Getting Started
Cyno's Editor is distributed in the industry standard ZIP format. To de-archive
the ZIP files, you will need an unzip utility. More then likely, you already
have one installed. If not, you can download the latest, free unzip utility
from Info-ZIP.
Installing the Program
Once you have the unzip utility handy, you need to decide where you would
like to place Cyno's Editor on your hard drive. Most likely, you would
select 'C:\' or 'C:\Program Files'. Any directory is fine. Place the Cyno's
Editor archive in that drive and directory.
Windows NT/95 Users, we suggest the 'C:\Program Files' directory.
Otherwise, you will have to modify the 'EditorWin.bat' file to accommodate
your selection.
If your unzip utility is a command-line version, rather than a windowed
version, then follow the following instructions. Open a command-line window
(For example, Command Prompt, etc), and change into the drive/directory
you wish to place Cyno's Editor. Type one of the following, depending on
which distribution you have:
unzip Editor or unzip EditorPak
The command above will automatically create a directory called 'Cyno's
Editor'.
Running the Program
To run Cyno's Editor, change into the Cyno's Editor directory. Then type:
java Editor
Or if you are using either OS/2 or Windows, you may simply execute one
of the batch files provided.
Command-Line Options
There are no command-line options for Cyno's Editor. However, you may specify
a file name on the command-line, in which Cyno's Editor will attempt to
read. Example,
java Editor readme.txt
OS/2 Set-Up
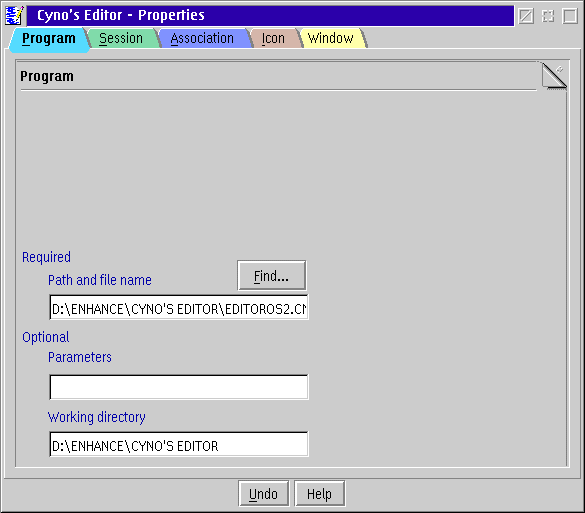
To set-up a Cyno's Editor icon on your OS/2 desktop, drag a 'program' template
onto your desktop. The properties box, shown below, should display automatically.
Use the 'Find' button to find the 'EDITOR.CMD' file and make sure to fill
out the 'Working directory' field. Note that on my system, I placed Cyno's
Editor in the 'D:\ENHANCE\CYNO'S EDITOR' directory; yours may differ.

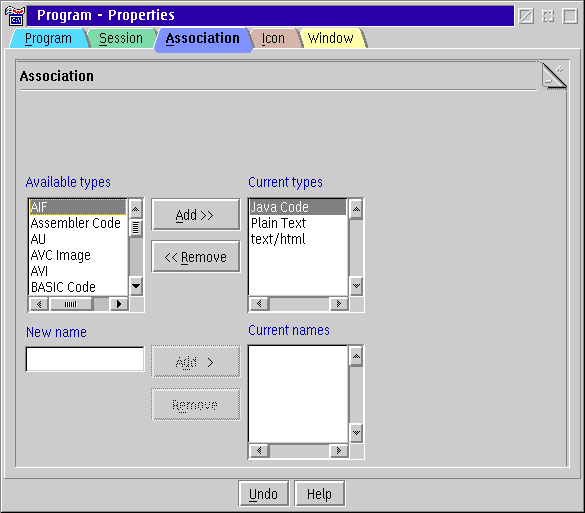
Click on the 'Association' tag. A window, like the one shown below,
will be displayed with nothing specified in 'Current types'. Add the 'Plain
Text' and 'text/html' types by selecting them in the 'Available types'
and press the 'Add ' button. Add other types as you wish.

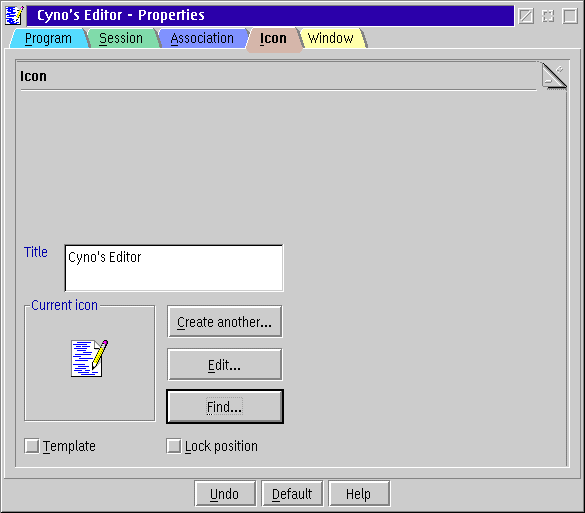
Now we are at the last step of creating a OS/2 icon. Click on the 'Icon'
tag. Enter 'Cyno's Editor' as the 'Title' in the window. Then click on
the 'Find' button to find the Cyno's Editor icon. When presented with a
window full of icons, select 'EDITOROS240x40.ICO' and press 'OK'. Close
the 'properties' box and we are done.

Windows 95 Set-Up
We have already created a shortcut for your Windows 95 workstation. Simply
drag the "Cyno's Editor 95" icon from the "Cyno's Editor" folder to the
"Start" menu.

Finally, double-click the "Cyno's Editor.reg" file to load system information
into your Windows Registry.
Windows NT Set-Up
We have already created a shortcut for your NT workstation. Simply drag
the "Cyno's Editor NT" icon from the "Cyno's Editor" folder to the "Start"
menu.

Finally, double-click the "Cyno's Editor.reg" file to load system information
into your Windows Registry.
Cyno's Editor, its manual, and its web pages are
Copyright © 1997 - 2008 by
Chieh Cheng.
All Rights Reserved.


![]()
![]()
![]()